Easily Stack, Mask, Blend Layers in Less Than 2 Minutes
Easily Stack, Mask, Blend Layers in Less Than 2 Minutes
Subscribe to YouTube
Adobe Photoshop How To Stack, Mask, Blend Layers
This tutorial is simply to show you the process of how to to select, create a mask from a selection on a different layer, and then blend layers. The images selected were not pick for how cool I can make something look, but to sho you a process. However, the Face Trees was selected for its high contrast of black and white. This makes the blend layer work seamlessly. So much of what you see in Adobe Photoshop is understand blend layers, and how an image is shot. Not fancy Adobe Photoshop work. Understanding the program is working smarter.

Load Layers into Stack
Use this path File/Scripts/Load Files into a Stack. You will get this window. Select Browse, and navigate to the folder with the supplied images. Select all the images, and click OK. Hit OK on the Load Layers window and Photoshop will stack all three photographs into one file.
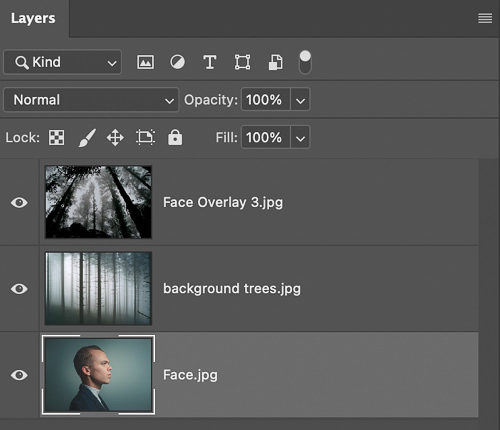
The next step is to make sure the order of the images is the same as in the video. From top to bottom Face Overlay.jpg, Background Trees.jpg, and Face.jpg. Turn off the face overlay, and background trees by clicking on the eyeball. Select the Face.jpg layer so it is highlighted as seen below.
Select Subject
Use the path Select/Select and Mask to bring up the Select and Mask window. Click select subject on the top of the window, then click refine hair. On the bottom right of the window make sure Output To: is set to selection.


Add Mask to Background
You should see the selection around your subject. Click the eyeball next to background trees.jpg to turn it on. Use the quick key CMD-SHIFT-I to select the inverse. Click the mask icon in the bottom of the layers window. This will create a white mask for the background, and put the background trees in the background of the image. At this point layers should look like the image on the left.
The next step in the process will be to add the Face Overlay.jpg image to the face of the subject. This process is extremely simple due to the fact that the image is high contrast. Instead of selecting the image we can simply use a blending mode to drop the light areas and keep the dark areas. This blend layer is my favorite what to composite image.
Duplicate Mask and Blend Layer
To do this, we can simply use the mask we already created to blend layers. To duplicate and move a mask you need to hold down the OPT or ALT key, and hold a left click. Simply, slide the mask up to Face Overlay.jpg, and that is it. At this point we need to turn on the Face Overlay.jpg layer by clicking the eyeball. Use the quick key CMD or CTRL-I to invert the mask, change the blending mode to Multiply (however, I like the contrast blending modes Overlay and Soft Light better.) That all you need to do to blend layers. If you want to move the image around the face, click the link icon between the Face Overlay.jpg image, and the mask. Select the image, and use the move tool to move the image. That is it. The most important tip I can give to you is, pick or shoot your image wisely. Take time to learn, and understand how the other blending modes or blend layers work. Good Luck and I hope this tutorial has been helpful.

Feel Free to Download the .pdf of this Process Below
Photoshop for Photographers
“Photoshop for Photographers” was designed as a supplemental resource for my class, “Photoshop for Photographers.” The goal is to teach you how to use Adobe Photoshop step by step. I understand this path is not for everyone and there is no reason you have to follow this process. However, if you want to really learn the program, I would suggest learning everything on the video and then move on.
Items Covered in this Video

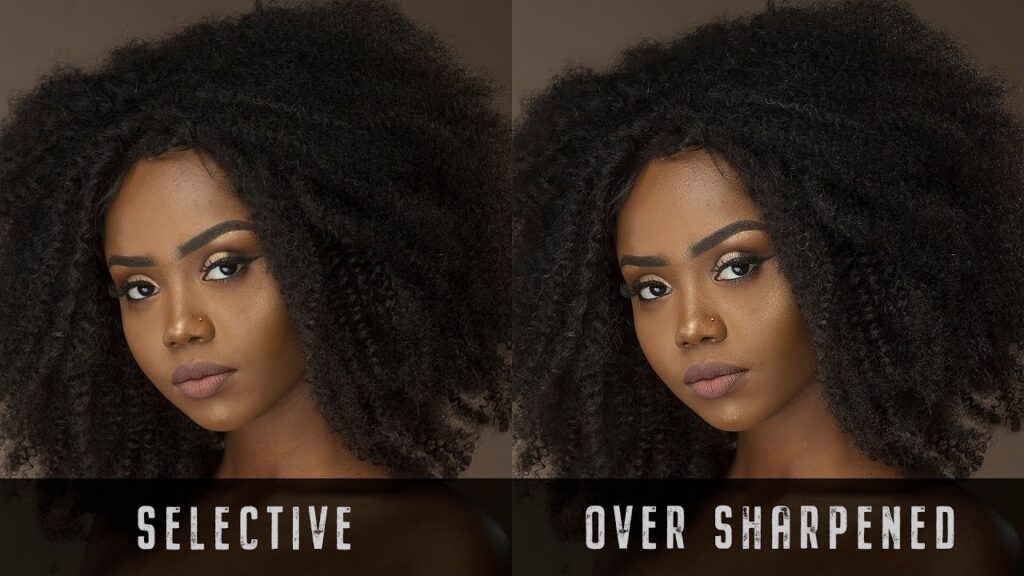
Sharpening in Photoshop. Which method is the best and how should I apply it.
“Sharpening is increasing edge contrast, don’t sharpen the entire image.”
JOHN WHITEHEAD IMAGES
Photoshop Requirements and Hard Drives
Working in Adobe Photoshop and with photography is more than just installing software and saving images to your computer. Computers these days are using solid State Drives SSD, which are fast, but do not have a large storage capacity. If you start downloading a bunch of photographs to your computer, it will not take long until you get a “Scratch Disk Full” error. This means your internal hard drive is full. Just to run a computer and Adobe Photoshop you need a sufficient amount of free space. Image previews are usually stored in a computer’s cache. This a temporary storage so it can quickly retrieve previews without recreating them every time you look at them. I cover this in the my Photoshop Preferences Tutorial. Personally, I store all caches on an external hard drive. At this moment I have 4 different hard drives hooked up to my computer. Two SSD’s and two enterprise optical drives, each performing a different task. All these drives are backed up via BackBlaze.
Another important aspect of running any of Adobe’s products are them requirements. Adobe lists the minimum requirements to run each of their programs, but you never want to be using the minimums, or the speed will drive you nuts. You need to realize that that your computer and every other application you run have requirements. So if you have Photoshop’s min of RAM 4GB, that will not allow any for your computer to run or a browser like Chrome. Below I will have two lists. One is some reasonable minimum requirements to run Adobe Software and what I am running. The second is a list of issues you will run into with insufficient hard drive space, and low minimum requirements. Just about every online student that I teach run into these issues. I hope this helps.
Minimum Requirements
- RAM 8-16 GB (I use 64GB)
- Internal SSD Hard Drive Space, 512 GB I have 1TB
- External Hard Drive 1TB, but more is better
- Processor Intel or equivalent i5 quad core processor or apple M1 or M2 (I use Intel i7 8core)
- A non integrated Graphics Card (AMD Radeon Pro 5700 8 GB)
Insufficient Requirements
- Scratch Disk Full
- Slow Computer
- Artificial Intelligence takes forever
- You can only open one program at at time
- Photoshop constantly crashes
- Learning Photoshop is frustrating because of the above issues
I have a Facebook Group called, “Learn Adobe Lightroom, Photoshop, and Bridge.” I created this group because I get a lot of questions on YouTube that are hard to answer unless I can see the issue. This will allow a place you can ask questions, and more importantly post images and videos.


